


 |
 |
|
|
Download or view additional information on Star TV like the channel lineup brochure, user guide and TV remote codes.
![]()
![]()
Dial 611 from your Star telephone. When prompted, choose option 1, then choose option 3.
Cause 1
Set Top Box is Powered Off (Set Top Box has a Red Light showing on the Front) The ADB Set-Top should display 2 Green lights below the time display on the front If a red light is present the STB is off. The ENTONE Set-Top should display a Blue light on the front panel. If a Red light is displayed then the Set Top Box is powered off.
Solution
Press the button labeled STB on your IPTV remote and then press the Power Button (This should cause the red light to become green or blue. The Set Top is now powered on)
Cause 2
TV Unit is Not on the Correct Input
Solution
Press the button labeled TV on your IPTV remote and then press the INPUT Button (The INPUT Button is located at the bottom-left of the remote) Go through the Inputs listed until you get to the appropriate Input that results in a picture. If the Input is TV or Cable, make sure the TV channel is set to 3 or 4
Cause 3
Cables connecting the Set Top to the TV are not connected correctly (Such cables may be Coaxial, HDMI, RCA-yellow red white, or Component-blue red green)
Solution
Secure the cables to the Set Top Box and to the TV unit
Cause 1
Modem (COMTREND or ZHONE) is not synced with our Field Equipment (DSL or ADSL light on the modem is blinking and not solid green)
Solution
Insure that the incoming phone line is connected to the LINE or ADSL port on back of modem
Cause 2
Modem (COMTREND or ZHONE) is not powered up (No lights are showing on the modem)
Solution
Check the power supply for secure connection. Determine that power is getting to the receptacle.
Cause 3
Set Top Box is not making physical connection back to the modem (LAN lights on front panel of modem coincide with LAN ports on back of modem)
Solution
Insure secure connection of Ethernet cable (large phone cord) into LAN2,3 or 4 Insure secure connection of Ethernet cable (large phone cable) into the back of the Set Top Box
***If all of the above causes have been resolved and the Set Top Box still does not boot up, please power cycle the modem. If the issue remains call the Main Office for Technical Support***
Cause 1
Battery Backup Supply unit (Grey box with Cyber-Power labeling) is not plugged into AC Outlet or the supply cable going outside from the unit to the Fiber Mod is not secure in the unit (Typically this cable will be routed down into the floor)
Solution
Insure that the Battery Backup Supply unit is plugged in to a working AC Outlet Insure that the supply cable going out to the Fiber Mod is secure in the unit
Cause 2
Set Top Box is not making physical connection back to the Fiber Mod
Solution
Insure secure connection of Ethernet cable (large phone cord) into the back of the Set Top Box
***If all of the above causes have been resolved and the Set Top Box still does not boot up call the Main Office for Technical Support***
Cause 1
Fiber ONT (white ZHONE unit) is not synced with our Field Equipment (DSL or ADSL light on the modem is blinking and not solid green)
Solution
Insure that the incoming phone line is connected to the LINE or ADSL port on back of modem
Cause 2
Fiber ONT (white ZHONE unit) is not powered up (No lights are showing on the modem)
Solution
Check the power supply for secure connection. Determine that power is getting to the receptacle.
Cause 3
Set Top Box is not making physical connection back to the Fiber ONT
Solution
Insure secure connection of Ethernet cable (large phone cord) into LAN2,3 or 4 Insure secure connection of Ethernet cable (large phone cable) into the back of the Set Top Box
***If all of the above causes have been resolved and the Set Top Box still does not boot up, please power cycle the modem. If the issue remains call the Main Office for Technical Support***
Cause
Set Top Box has stopped passing video through
Solution
Power Cycle the Set Top Box by unplugging the power to the Set Top and replugging (Power cord is typically the smaller black cord connected to rear of the box)
Cause
Set Top Box has stopped passing audio through
Solution
Power Cycle the Set Top Box by unplugging the power to the Set Top and replugging (Power cord is typically the smaller black cord connected to rear of the box)
Cause 1
Batteries in Remote are Dead (STB button should light up red when changing channels. If not then check batteries)
SolutionChange out the batteries in the remote
Cause 2
Infrared Eye on the Set Top Box is blocked
Solution
Make sure no objects are in front of the Set Top Box that may be blocking the remote signal
Cause 3
Resolution of the STB is incorrect (ADB Set Top Boxes Only)
Solution
Using the remote Press the Green button located between the Red and Yellow buttons Then immediately press the button labeled with number 1 Next press your Guide button to display the Channel Guide on the screen. If the Channel Guide displays, then the problem should be resolved. If the Channel Guide does not display repeat the process using 2,3,4 or 5 until the Guide displays
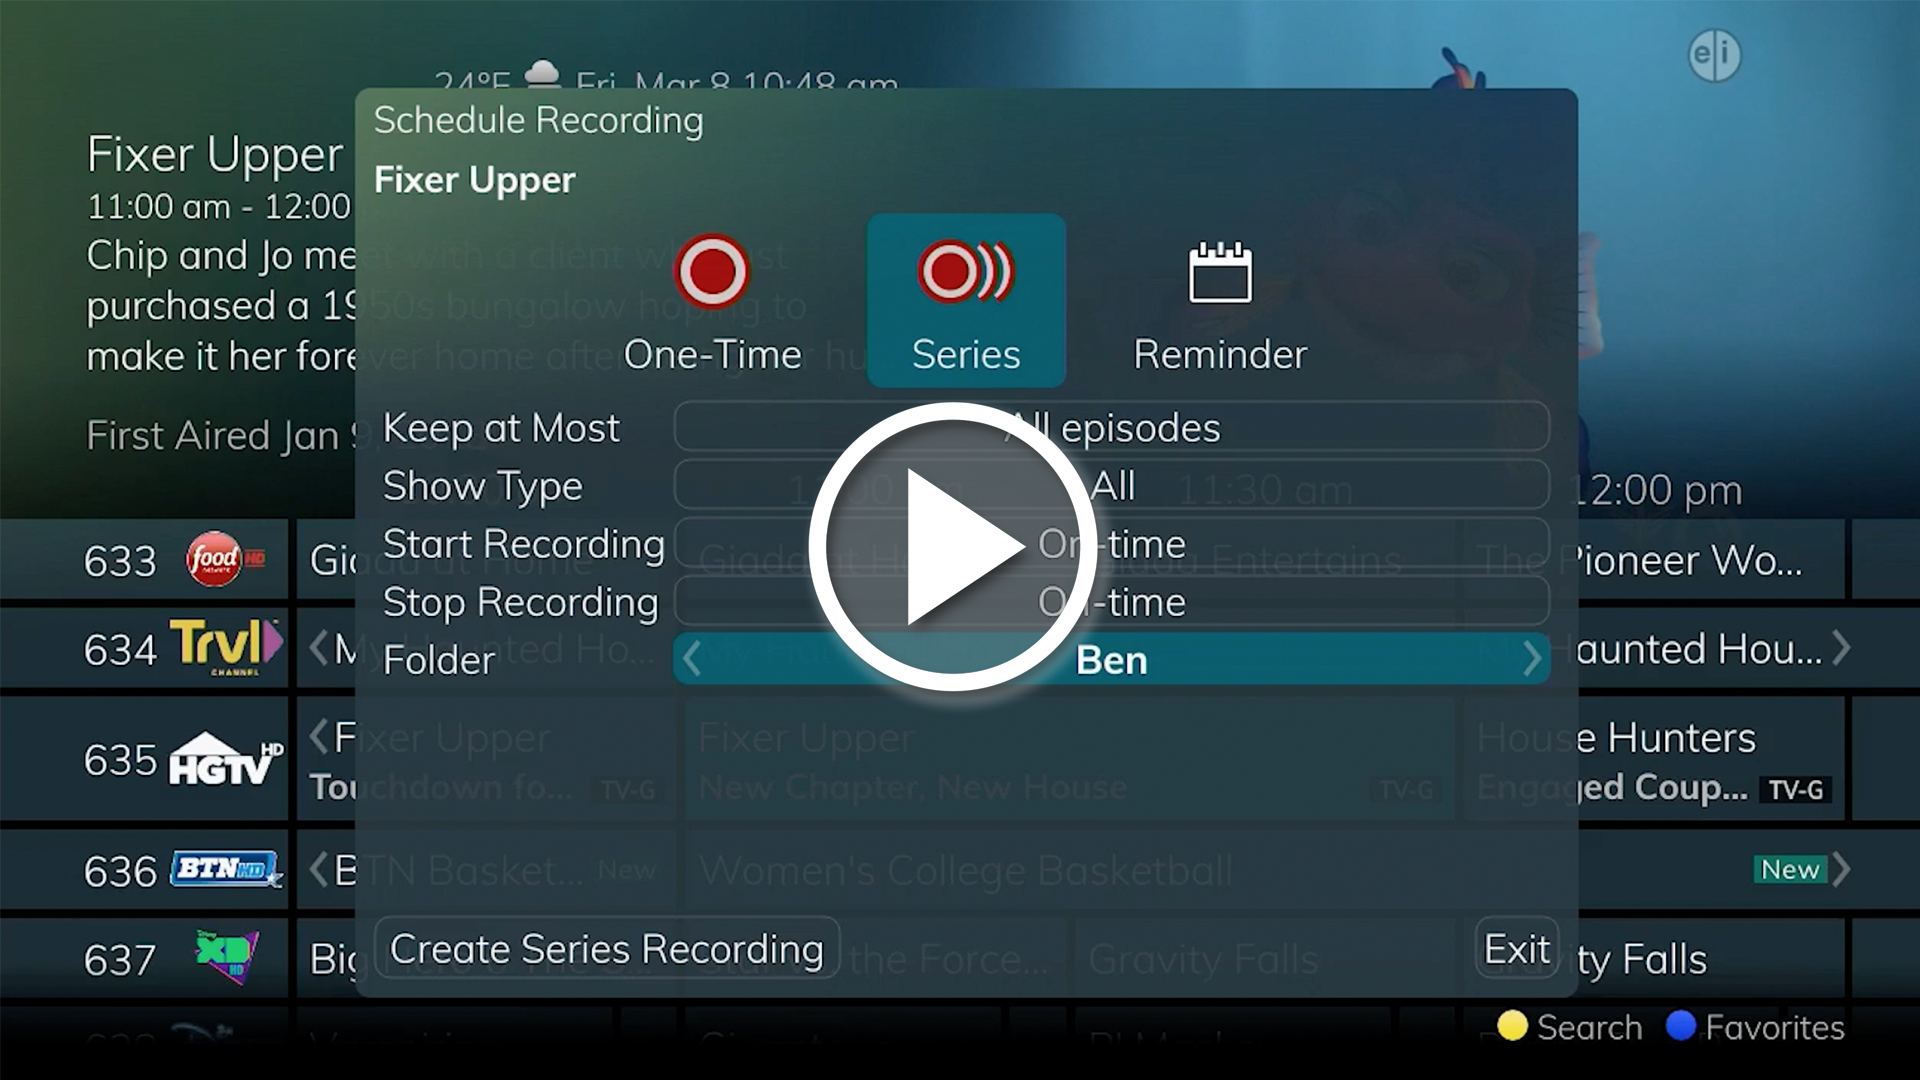
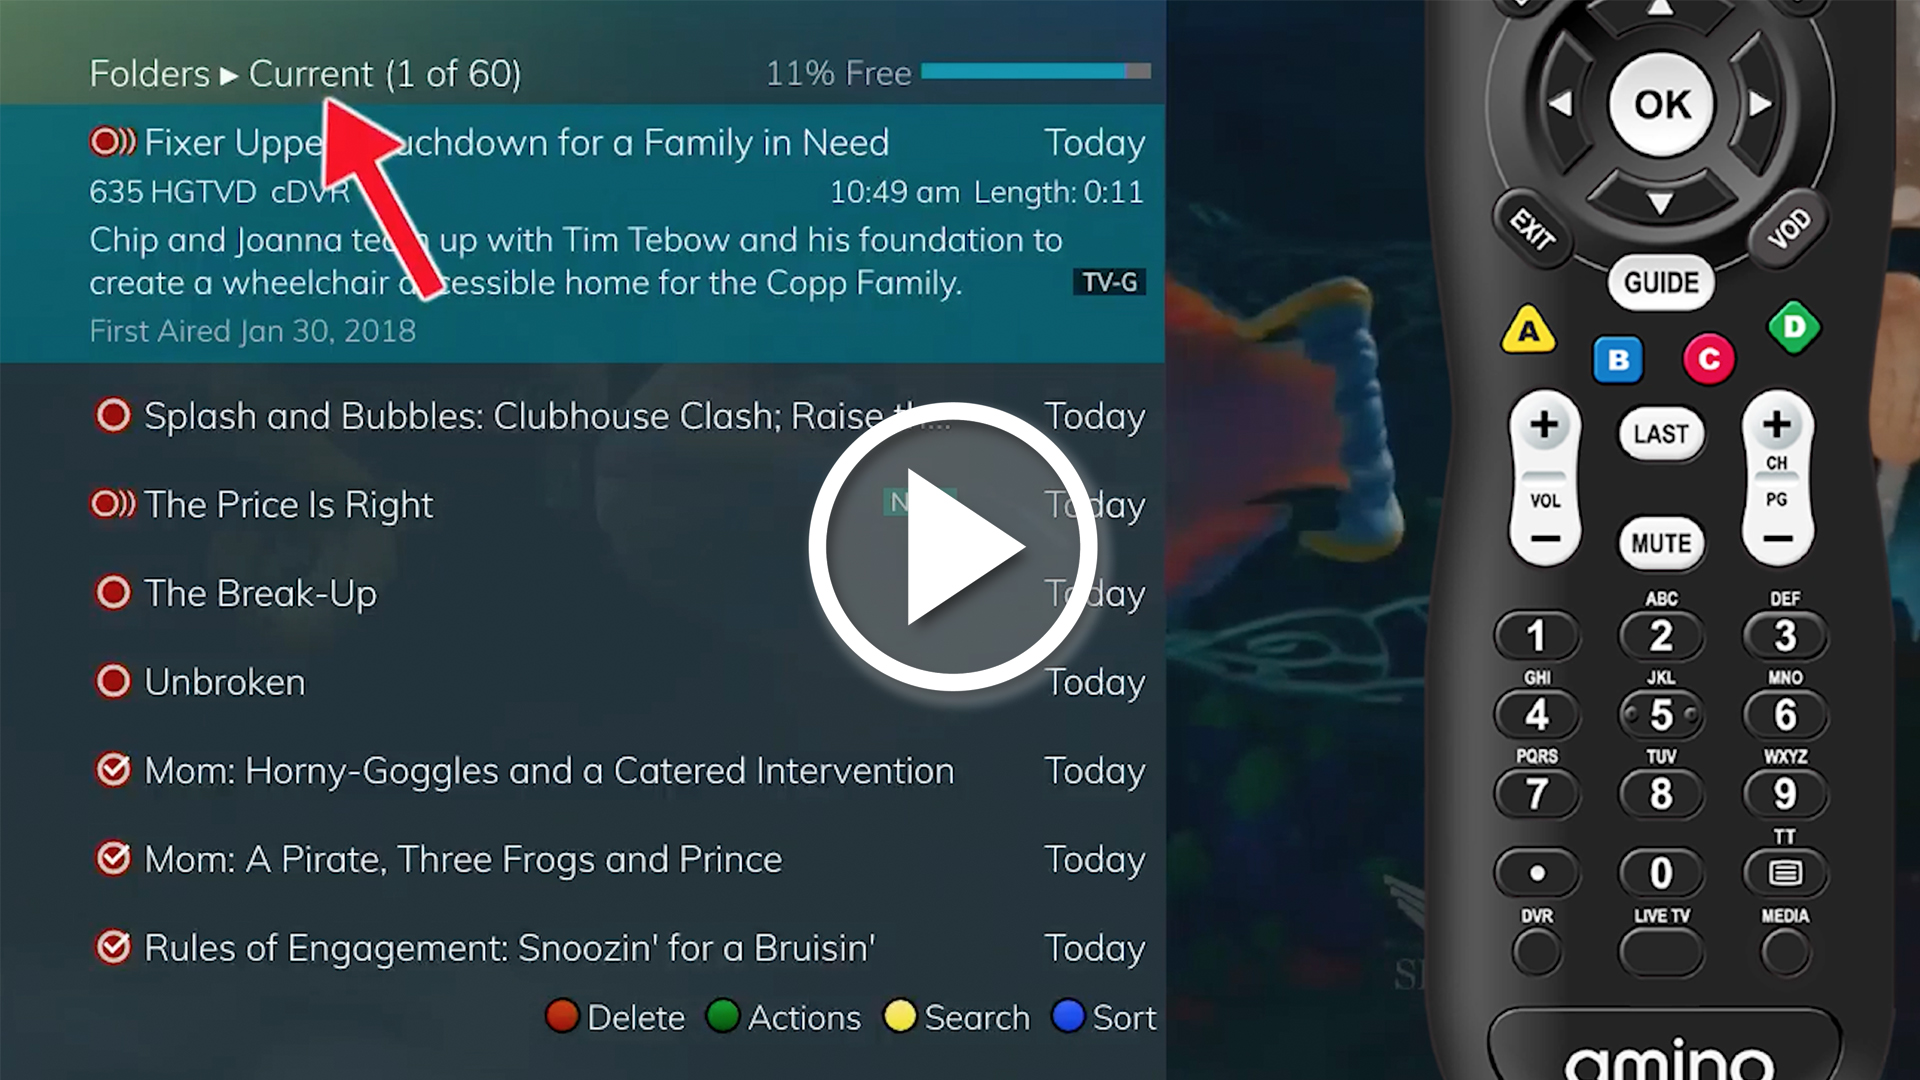
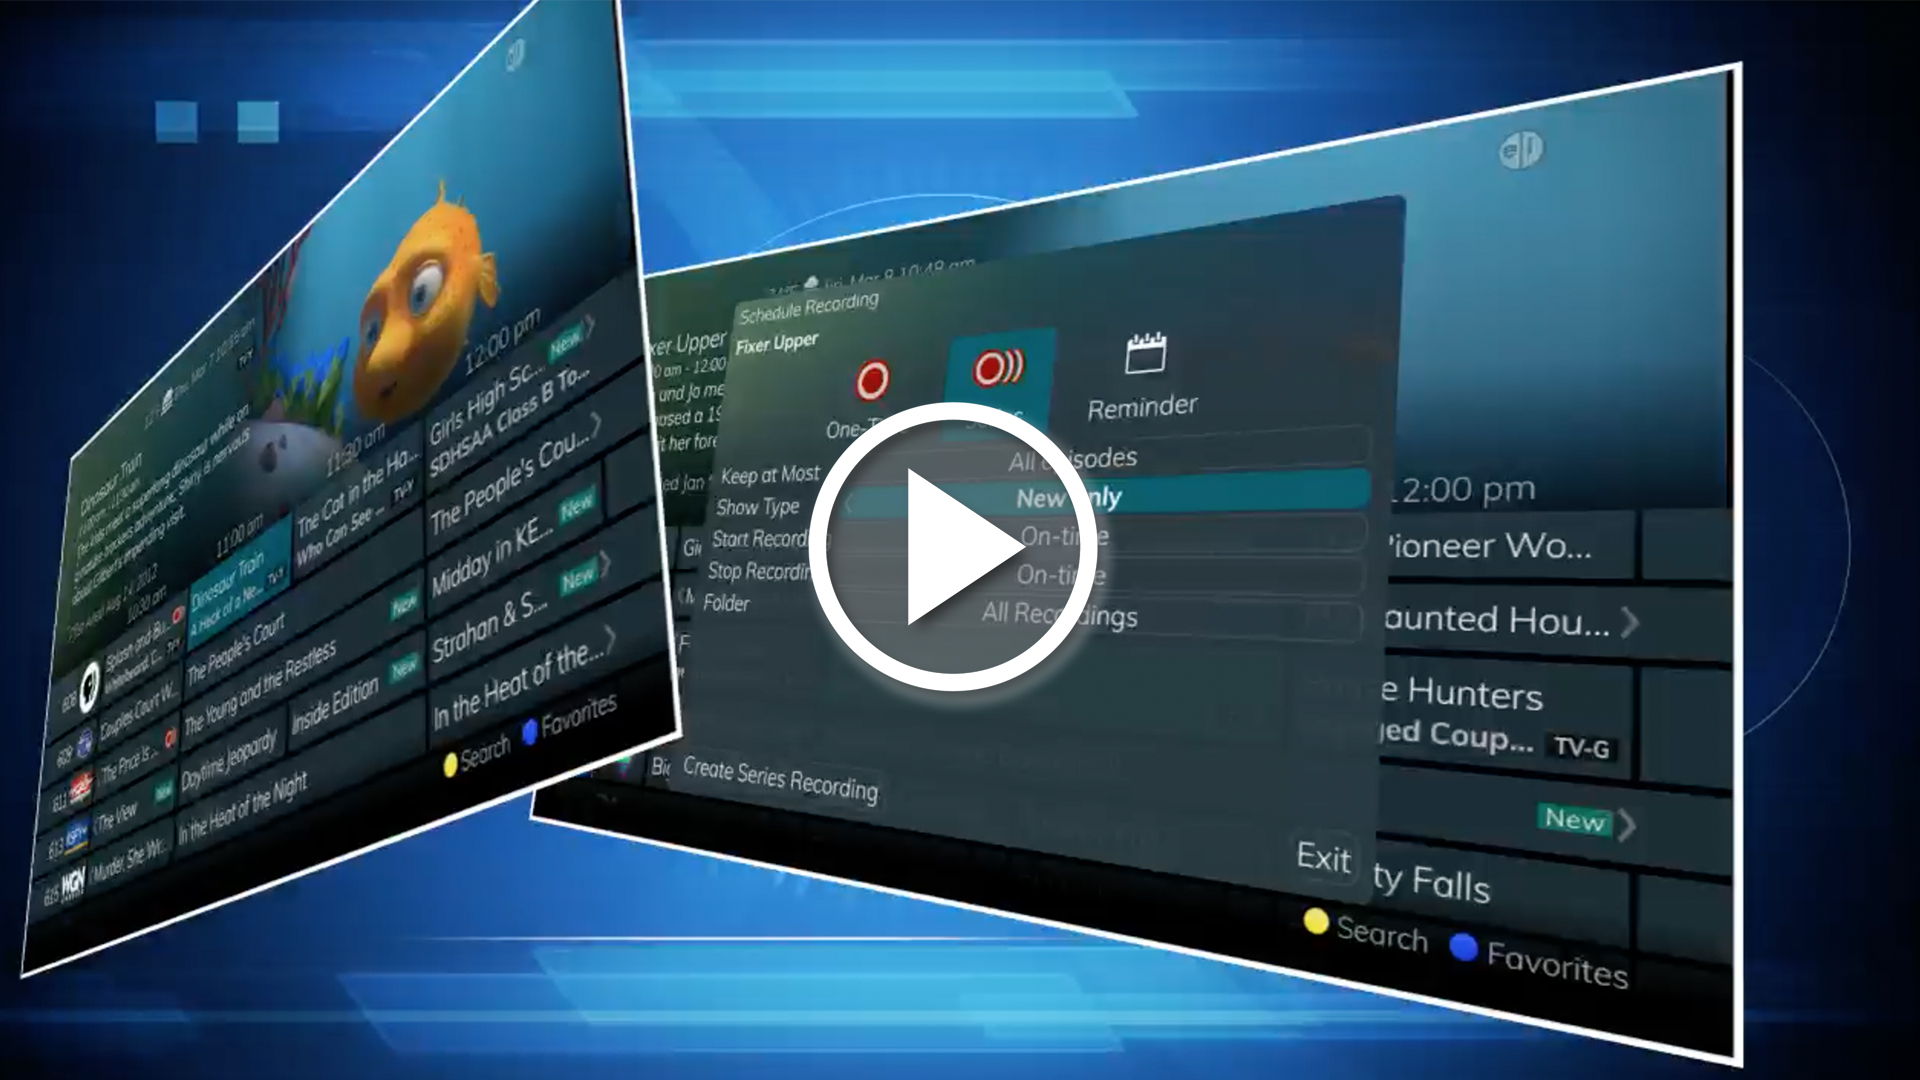
Cloud DVR (Cloud Digital Video Recorder) gives you access to programs you want to record, as well as reviewing recordings you have scheduled. You may also create a scheduled recording event, review the history of what you have recorded recently, or delete your recording history. Cloud DVR allows you to record programs digitally without the need for tapes or discs, as well as pause live TV.
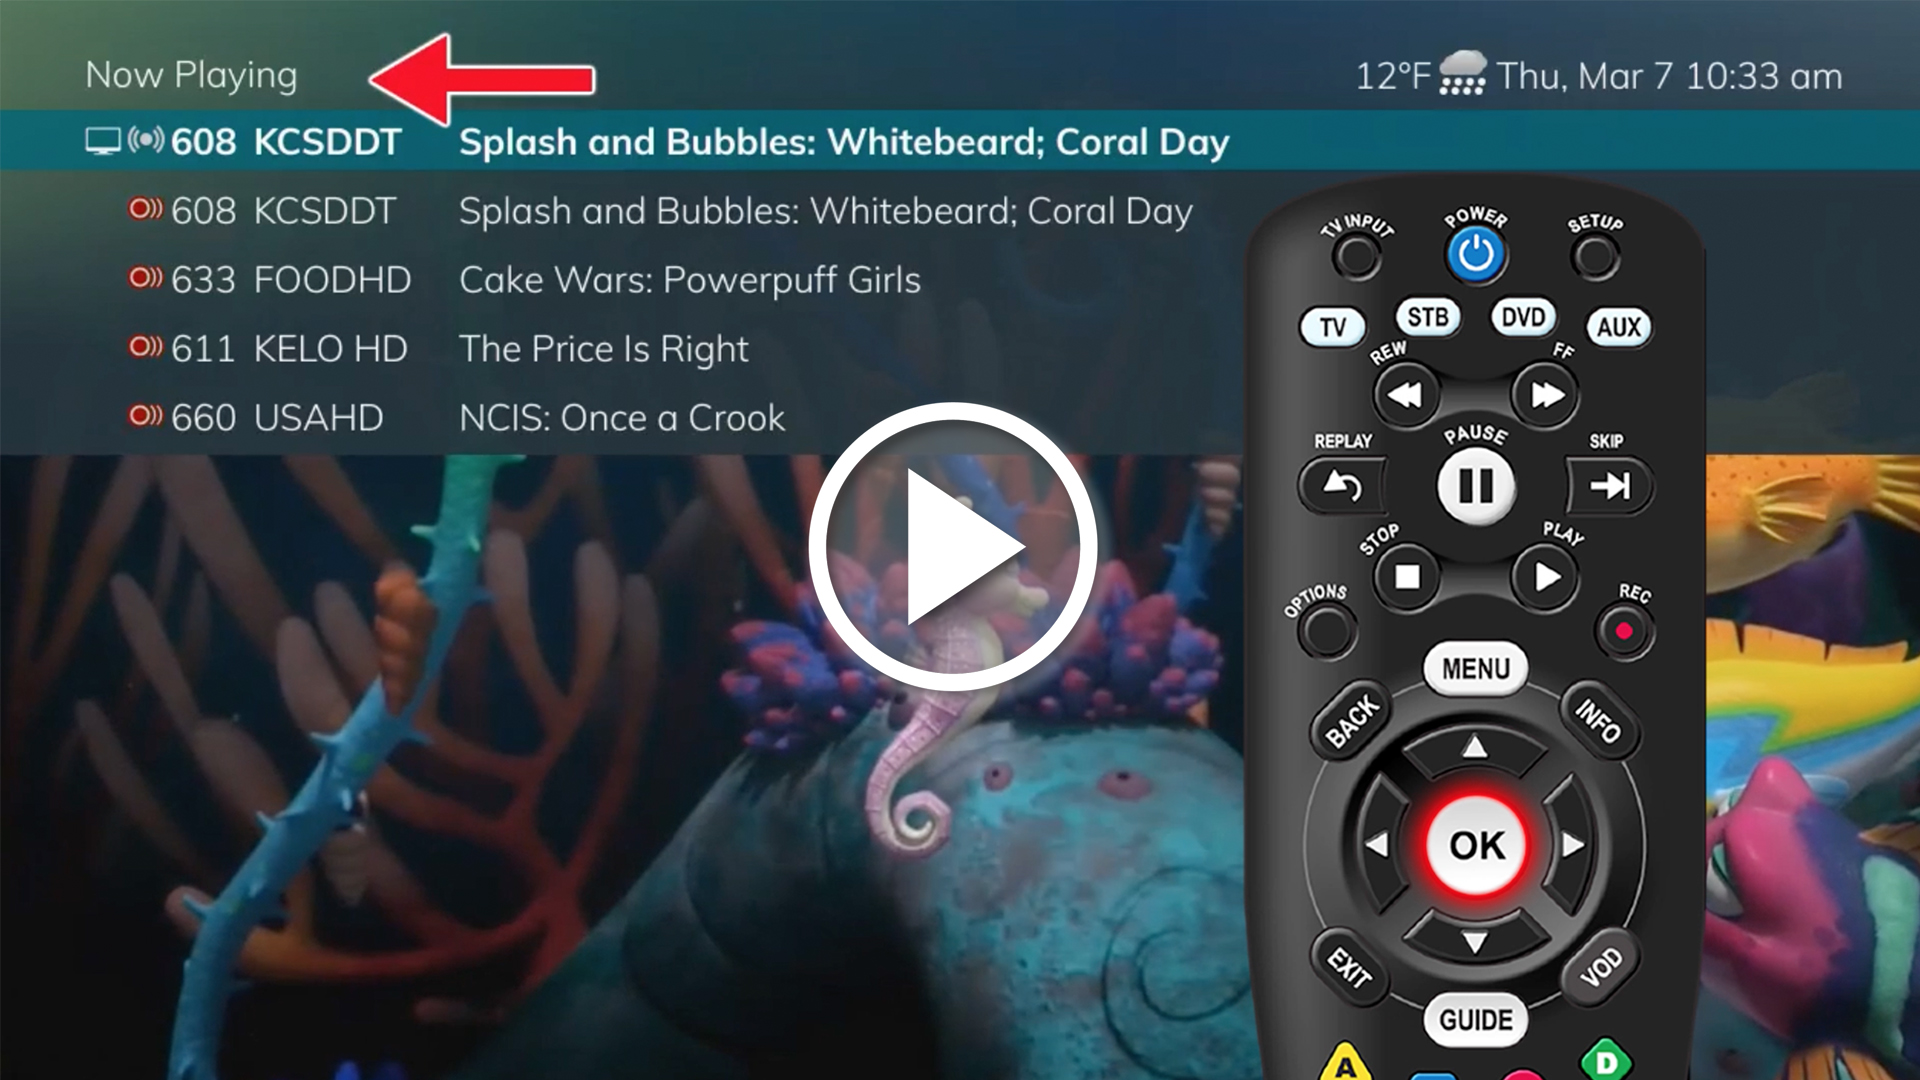
The fastest and easiest way to begin recording using DVR is to use the Record button on your remote control.
While watching a program, simply press Record. Your settop box will immediately begin recording, and the Info Bar will appear with a red Record icon to the right. Once recording has started, a DVR icon will replace the Record icon on the Info Bar, indicating you are now watching a program recorded to DVR. You may also start a quick record from the Guide screen. Simply highlight a program you want to record using your direction buttons, and press Record. If the program is currently on, recording will begin immediately. If the program comes on in the future, a Recording Event is scheduled and your settop box will record the program for you automatically. Your TV does not have to be powered on for recording to take place, only your Star TV settop box.
Pause Live TV (PLT) - DVR also allows you to pause live TV. This refers to pausing the program you are currently watching. This can allow you to walk away from your TV and then return without missing anything. You can fast forward from the point where you paused up to real time.
The DVR service allows multiple programs to record simultaneously, depending on signal limitations.
For more information on the DVR service, tune in to the Star TV Help Channel (Channel 1)
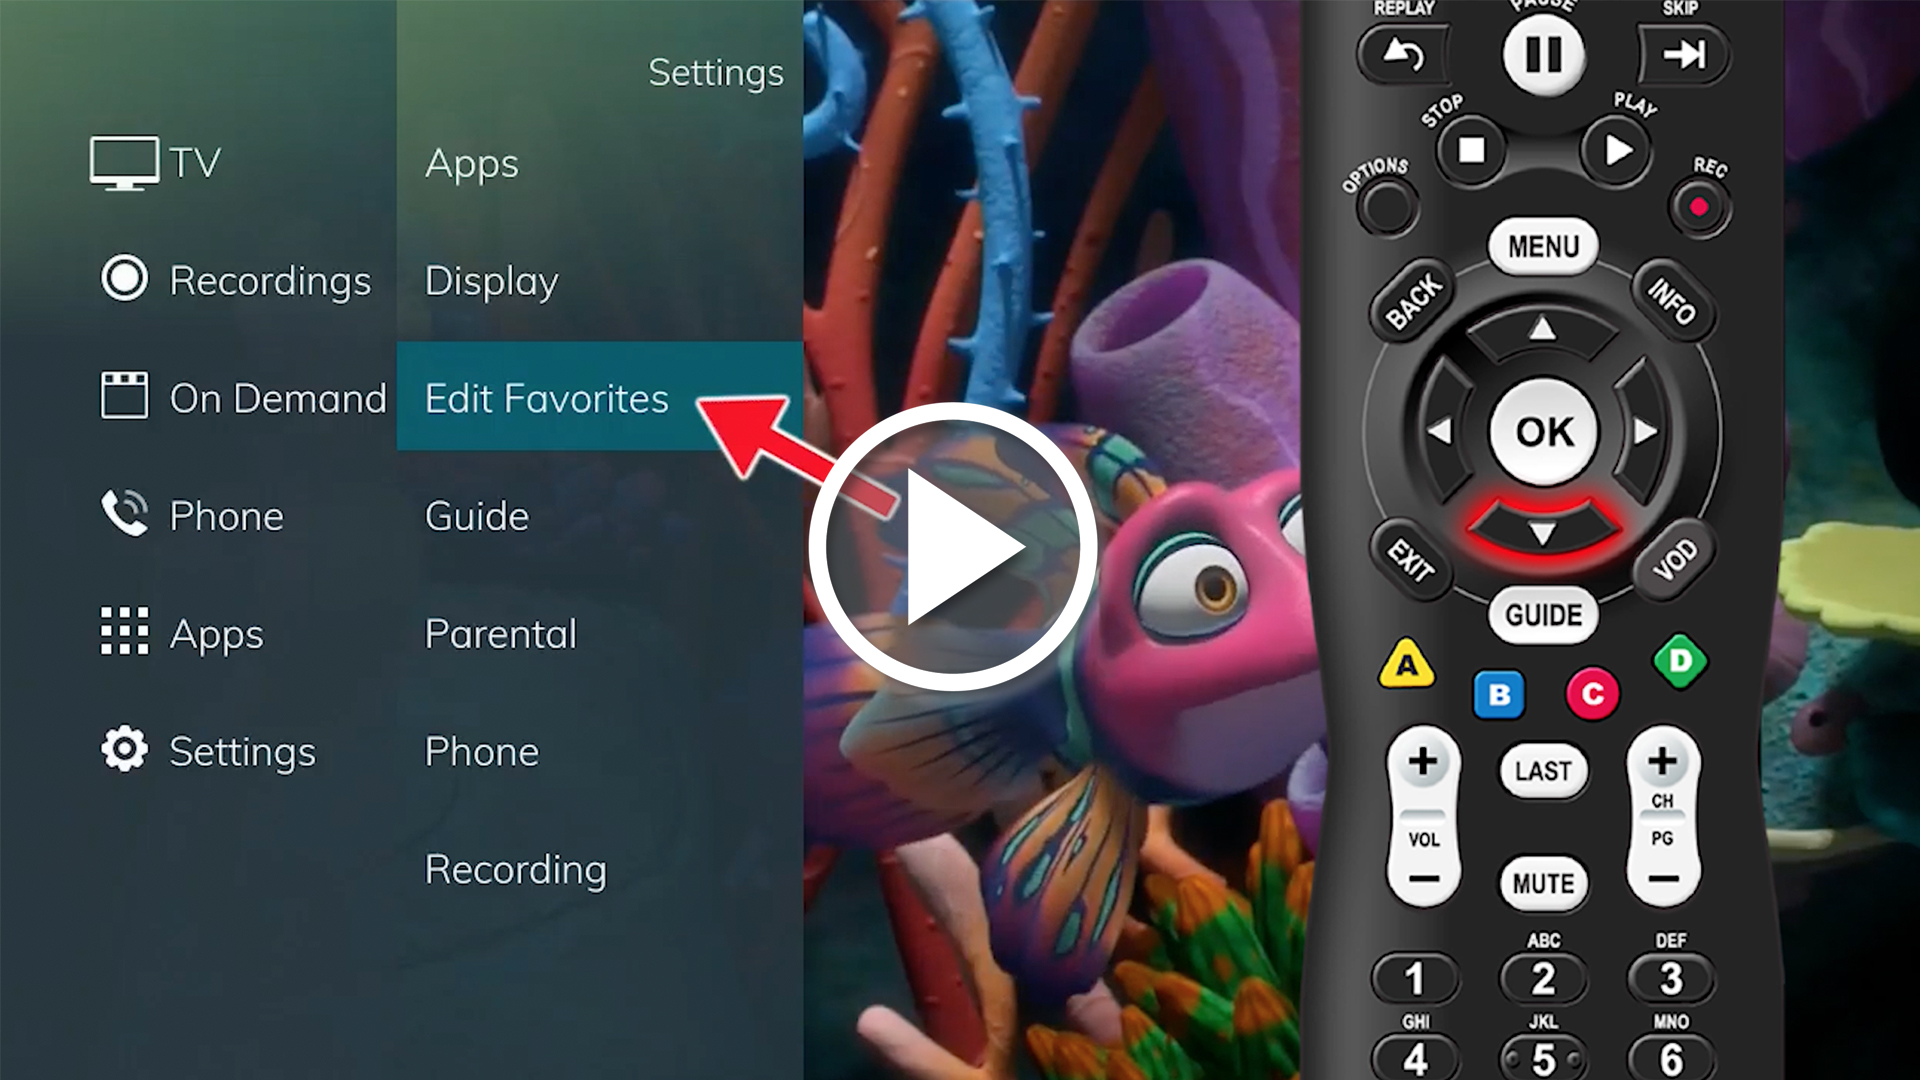
From the Favorites menu, you may create a list of your favorite channels. It gives you the ability to create, edit or delete channels in this list. You may have one or more Favorites lists.
Open Favorites Menu – Press the Menu button, use the arrow buttons to select Favorites, and then press the OK button. A screen will show the following options: choose, edit, create, delete, or cancel to go out of the Favorites screen.
Create or Edit a Favorites List
Design your Favorites List – once you press OK in step (1) you will see the Favorites create/edit screens. These screens show every channel offered. Select the text box under Name of this Favorites List, press OK. Here you can use the on screen keyboard to enter or revise the name for your favorites list then select OK. To the left of each channel entry you will see a check box. Highlight any channel you would like to add to or delete from your favorites list and select OK.
To delete all channels from the selected favorites list, select the CLEAR button found at the bottom right of the screen and select OK. To save a Favorites List, select the Done button at the lower right of the screen and select OK.
Choose a Favorites List – You have a couple of options for choosing a favorites list:
Select Favorites list from the Menu bar – Follow the steps for “Open Favorites Menu” once there select Choose then press OK. Now select the favorites list you want and press OK.
Select Favorites List from Guide – Press the Guide button which will open the Guide. If you press Guide again it will go to the next Favorites list, by pressing Guide several times you will cycle through all of your Favorites lists. Pressing Guide once you have been through all of the lists will exit the Guide.
You can find more information on Favorites by viewing the Star TV Help Channel (Channel 1) or going to www.stmc.net/startv
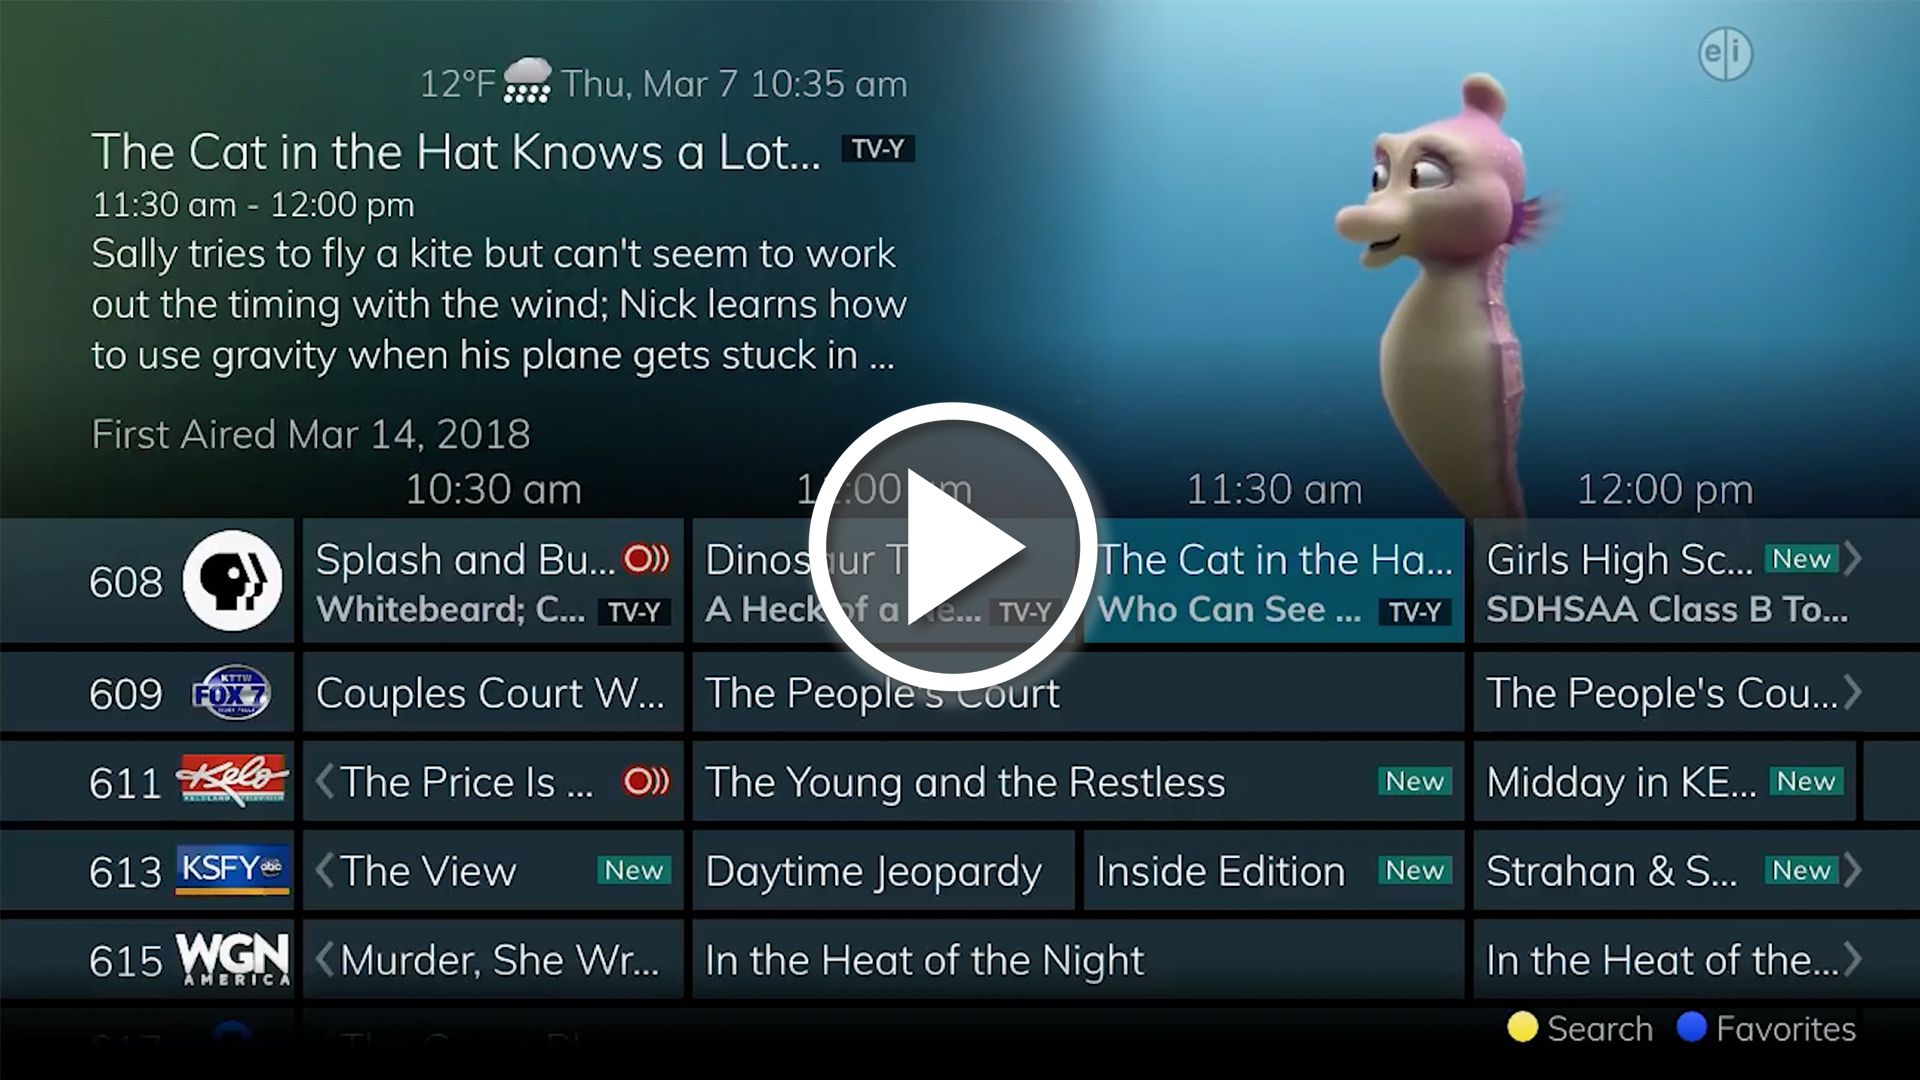
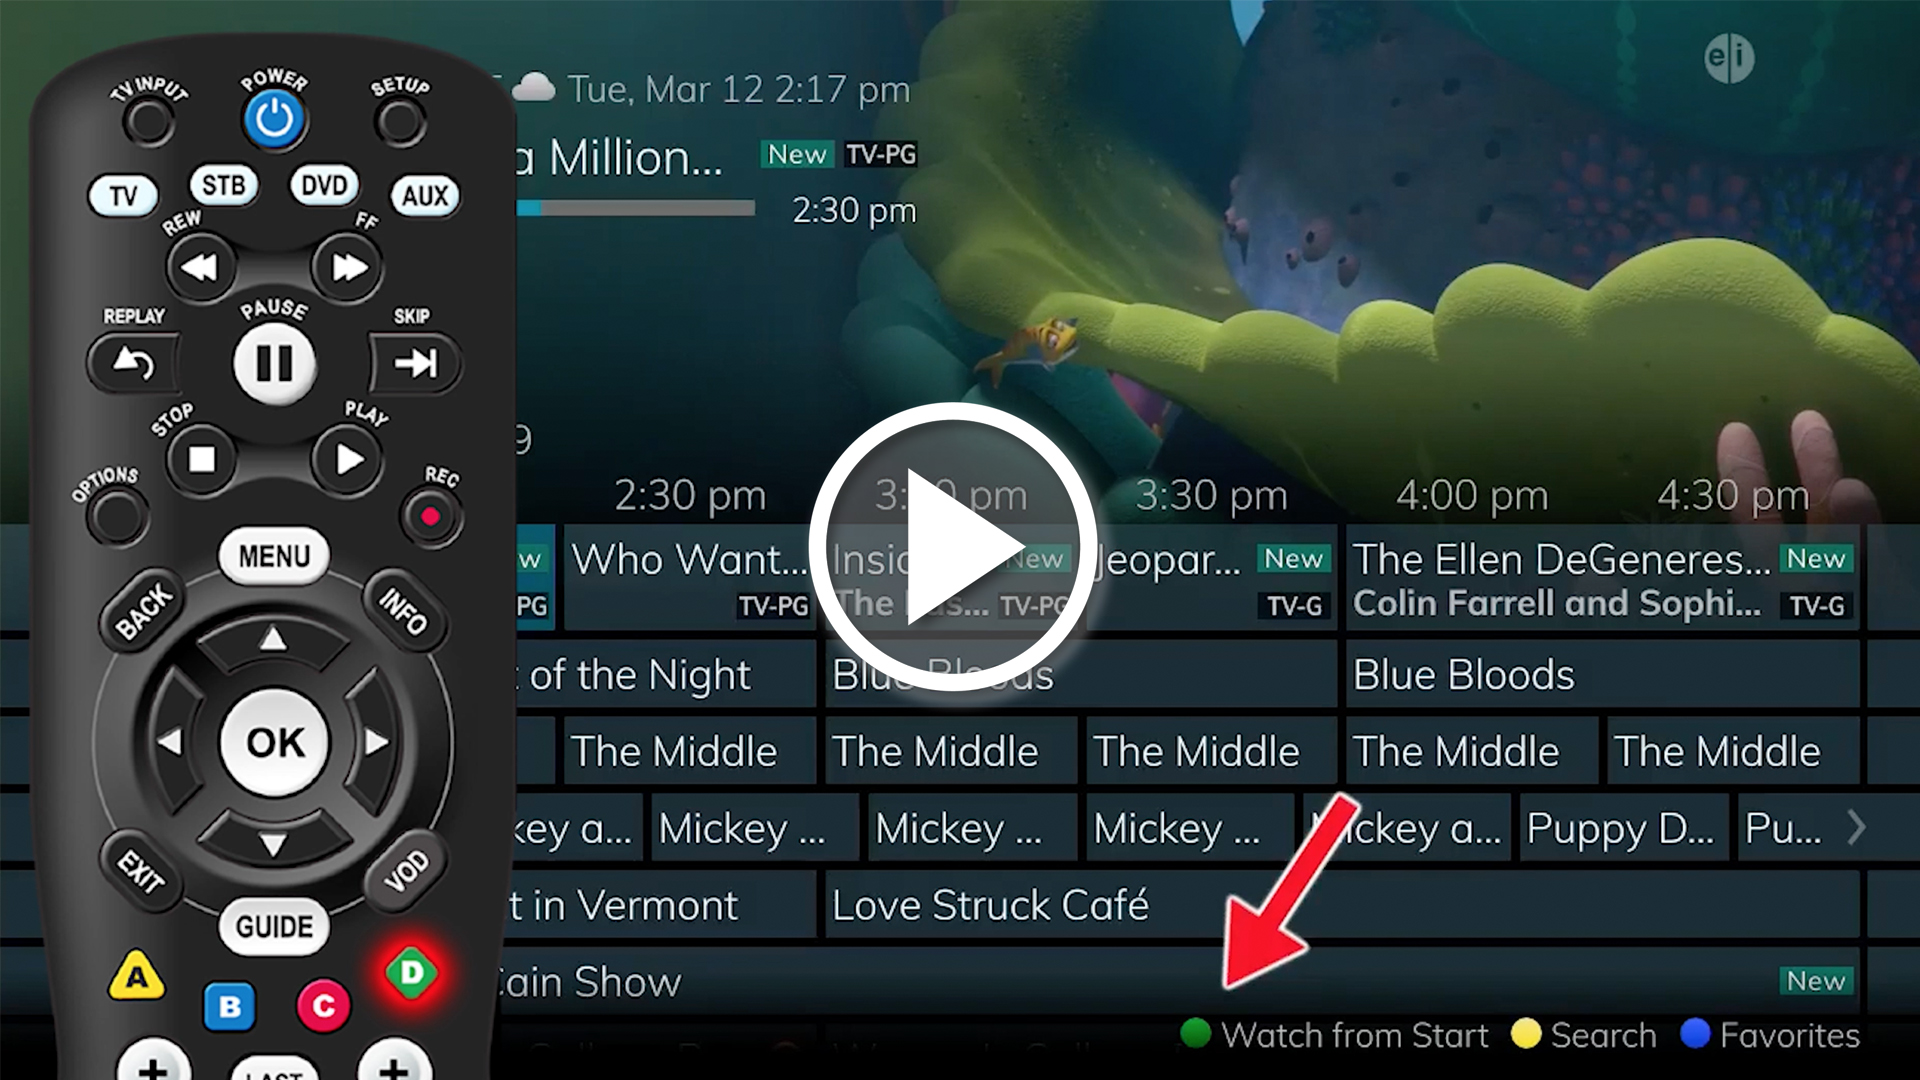
When searching for channels, Guide is the place to quickly find out what’s on now and what’s playing later. You may also use Guide to set reminders or recordings for upcoming programs.
There are (2) two ways to access the Guide. Gray remotes press the Action button, black remotes simply press the Guide button.
Navigating Guide - Press the direction buttons to move the highlight. Jump to a channel by entering the channel with the Number pad (0-9). The Directional Pad allows you to scroll up and down the current page. The Program +/- key allows you to scroll by page. Press OK to choose the program you have highlighted. If the program is currently showing, Guide will tune to the channel automatically. Press OK or Exit to leave the Guide.
Scheduled Events may be used if the program you want to view comes on at a later time. You can set the Guide to Reminder, Auto Tune or Recording (if you subscribe to the DVR service).
For more information on how to use Guide, tune in to the Star TV Help Channel (Channel 1)
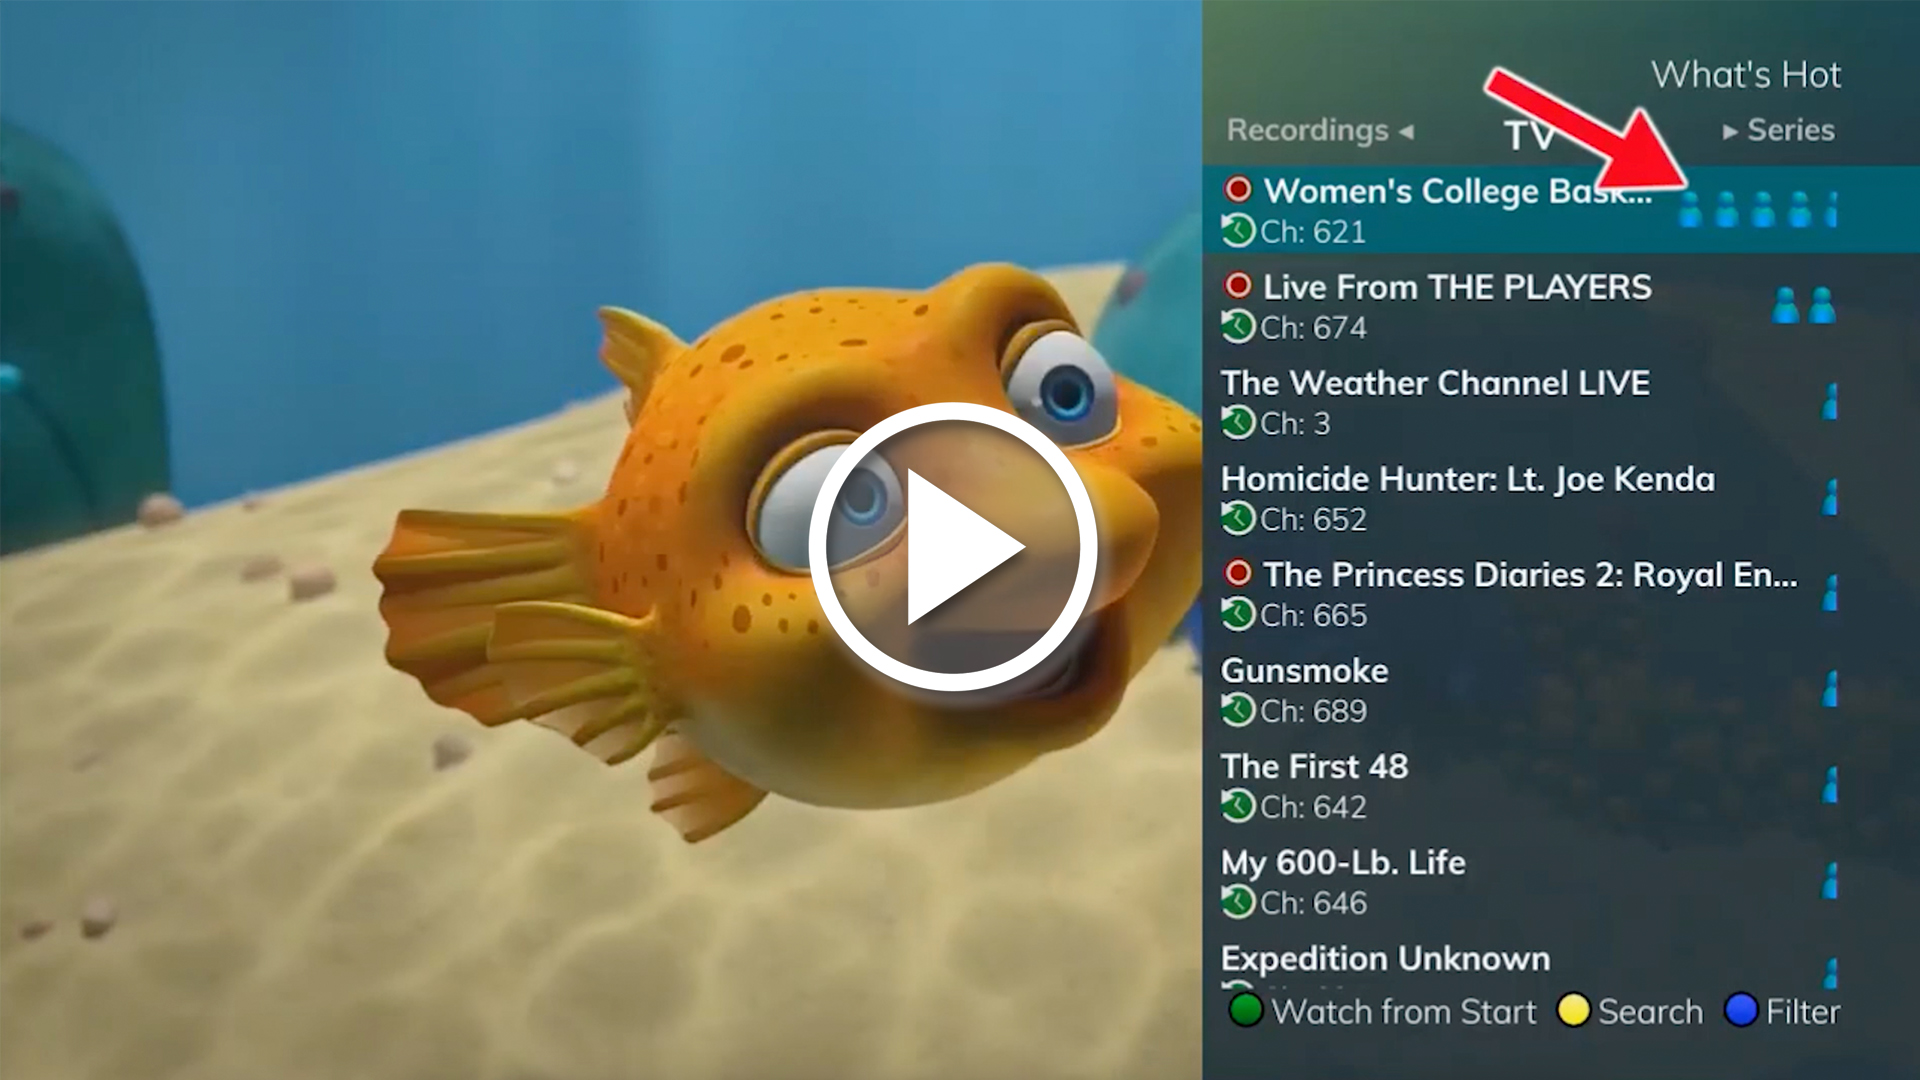
The Search option allows you to enter the name or portion of the name of any program you would like to find. The search feature will search the program guide and locate it for you.
Open Search Options – Press the Menu button, use the arrow buttons to select Search, and then press the OK button. A keyboard will appear on-screen. Using the arrow keys, select each letter in the name of a title you are looking for, pressing OK after each letter. If an incorrect letter is entered, select Del then OK and this will take you back one space. If you would like to start over, select Clear All and OK. Once you have entered the name of the program, select Done then OK.
Entering the entire title of the program is not required. The search will typically locate the program you are searching for with as little as three or four letters.
Once the program is located, you can select it for viewing, recording, or set a reminder for the channel to automatically tune to the desired channel to be recorded.
You can find more information on the Search option by viewing the Star TV Help Channel (Channel 1)
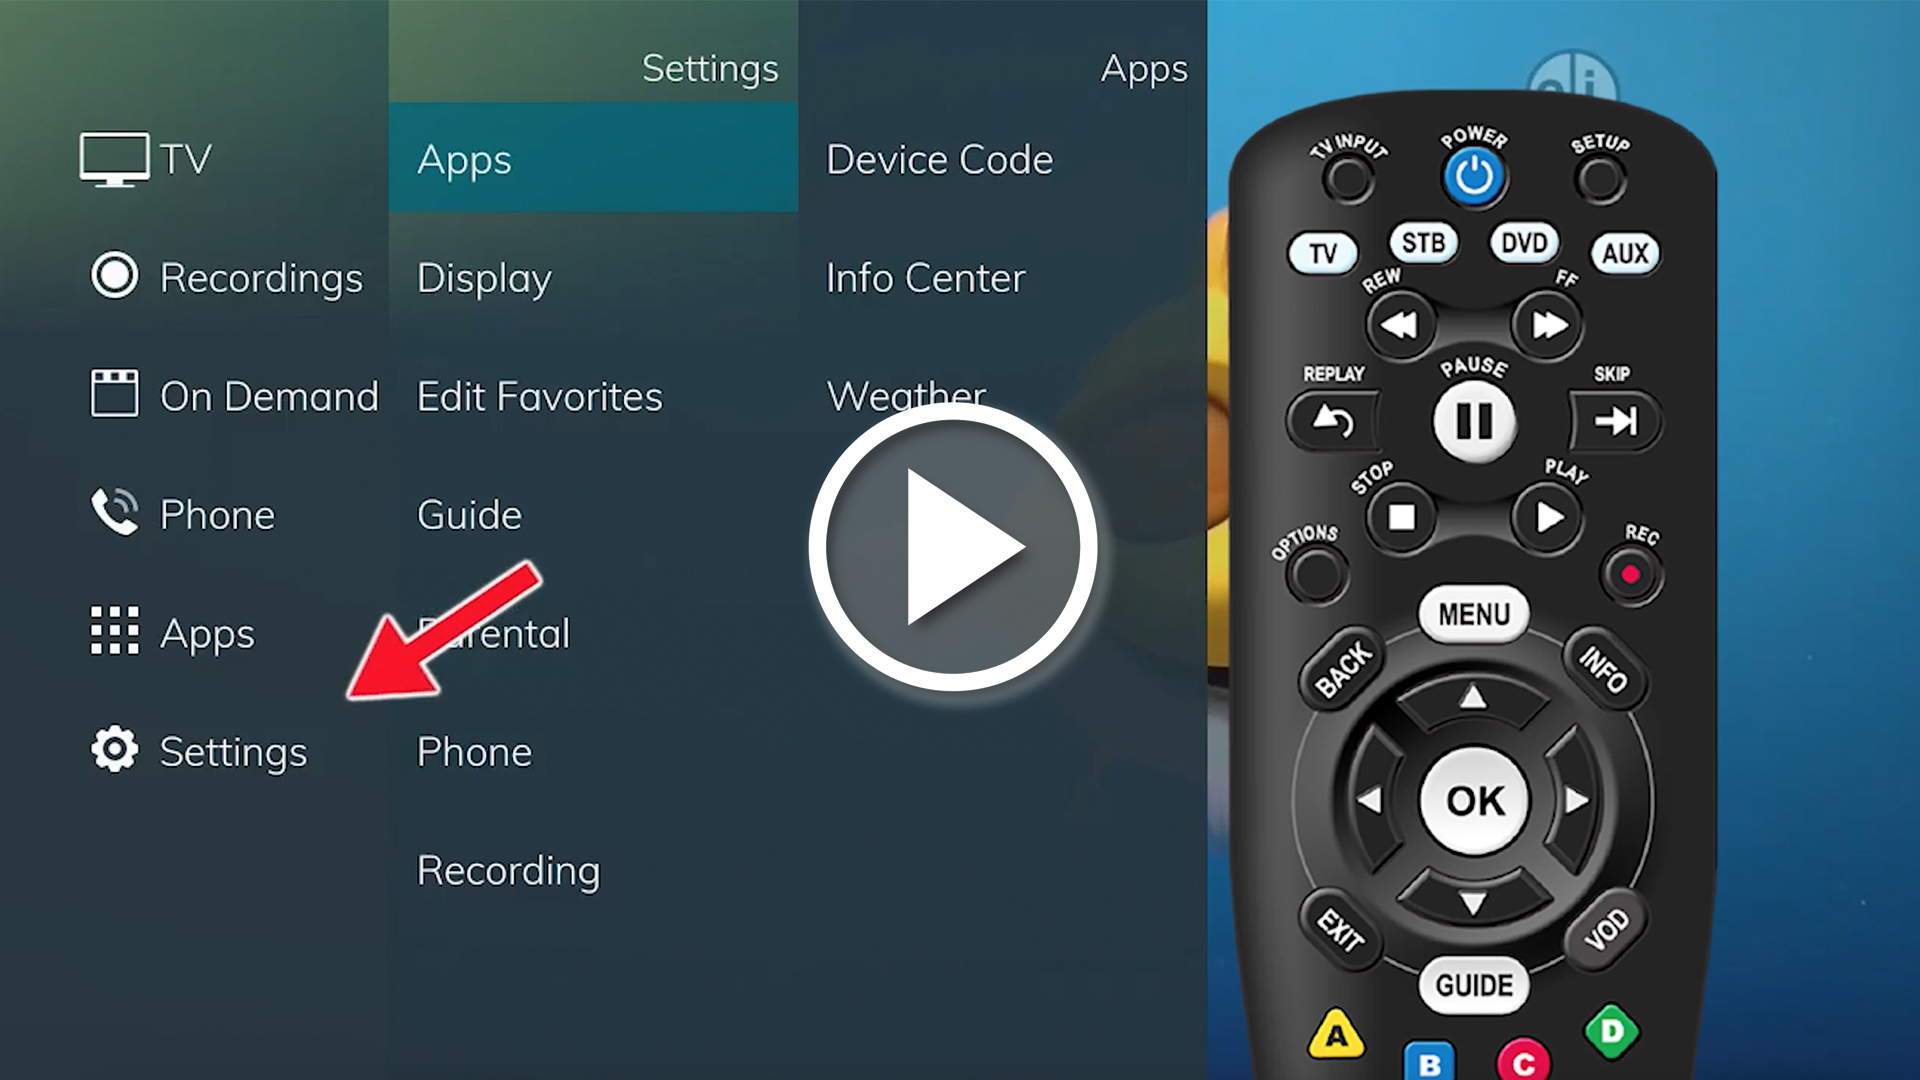
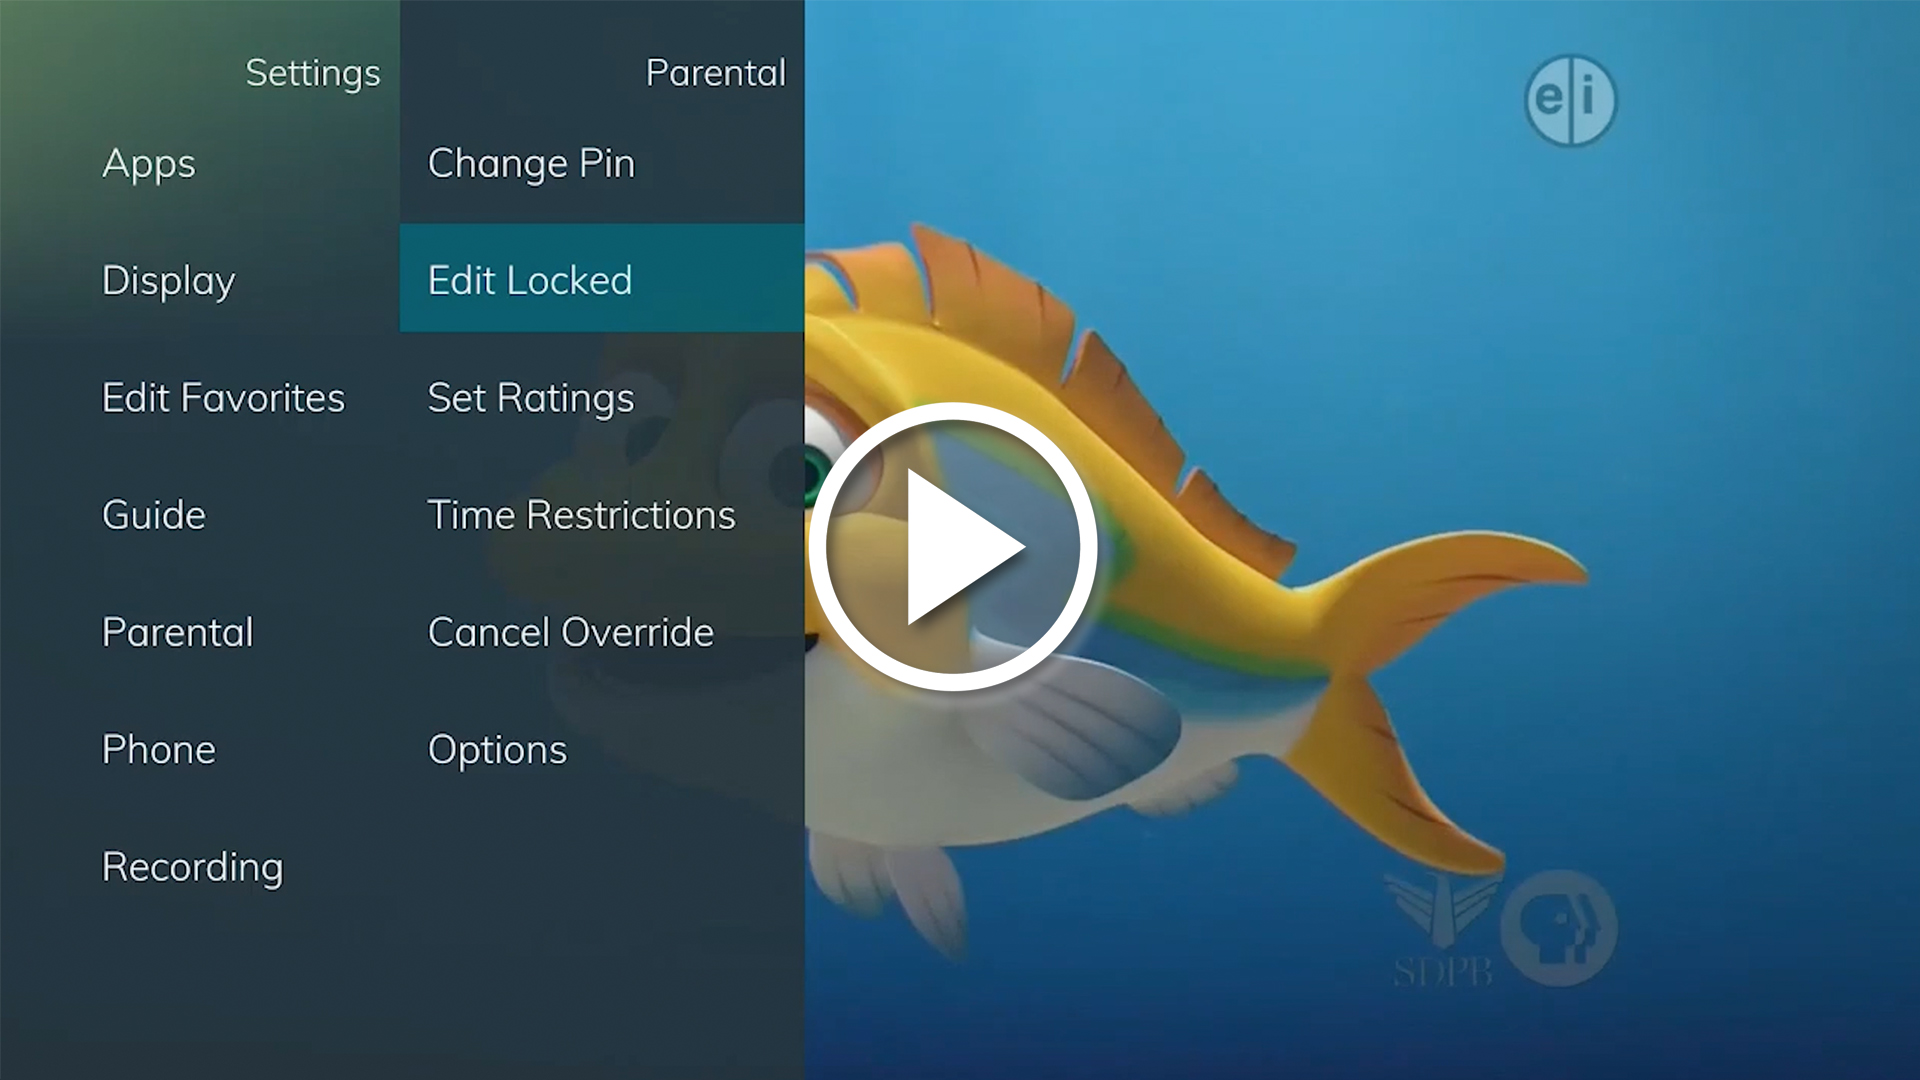
Two of the most common accessed areas of Settings are Parental Controls and Block Channels. To access these options, use the following steps:
To open the Settings Menu – Press the Menu button, use the arrow buttons to select Settings, and then press the OK button. A screen will show with tabs for Preferences or Users. The Preferences tab offers settings that affect your overall service such as the way screen alerts are handled, the theme that is used, Parental controls and Blocked channels. The Users tab offers settings related to creating, deleting or editing user accounts. This includes PINs, passwords and parental controls for that person. User accounts allow each viewer to have individual settings.
Parental Controls – Go to Settings, scroll down using the arrow keys and select Parental Controls and OK, this will place a check in the box, turning Parental Controls on, or remove the check (the same way) if you wish to turn Parental Controls off. Note: Parental Controls will not show on the Menu until set up in Settings. The default password for Parental Controls is the last four digits of your home telephone number – we highly suggest changing the default to something else.
Channel Blocking – Go to Settings, scroll down using the arrow keys and select Channel Blocking and OK this will place a check in the box, turning Channel Blocking on, or remove the check (the same way) if you wish to turn Channel Blocking off.
For more details on how to set up Channel Blocking, view the Star TV Help Channel (Channel 1)
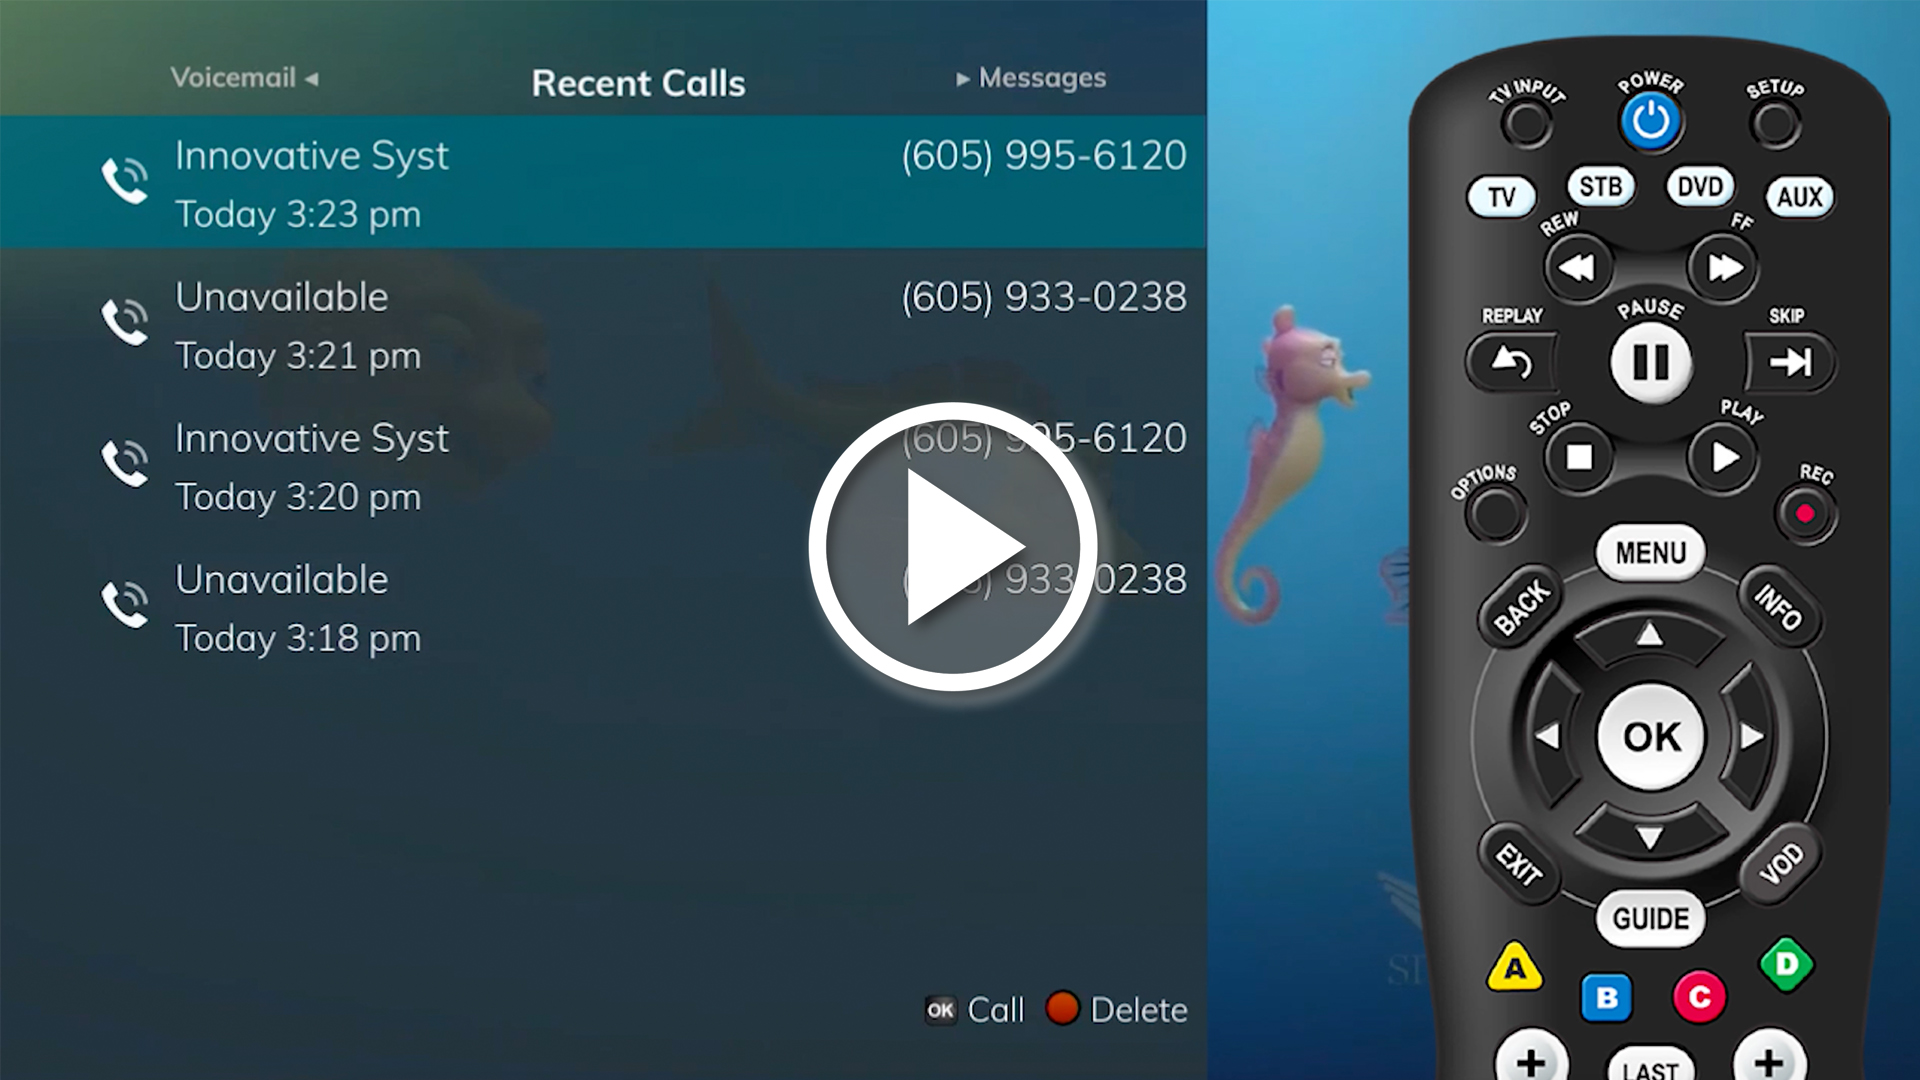
To view your Caller ID log and messages, press the Menu button and select the Vault option. This allows you to scroll through your Caller ID log, and view any messages we may have sent you regarding updates to the system, and other important information.
Included under the Vault option are Reminders, Pay Per View Events, Sports Packages, and Pay Per View Block.
For more information on the Vault, tune in to the Star TV Help Channel (Channel 1)